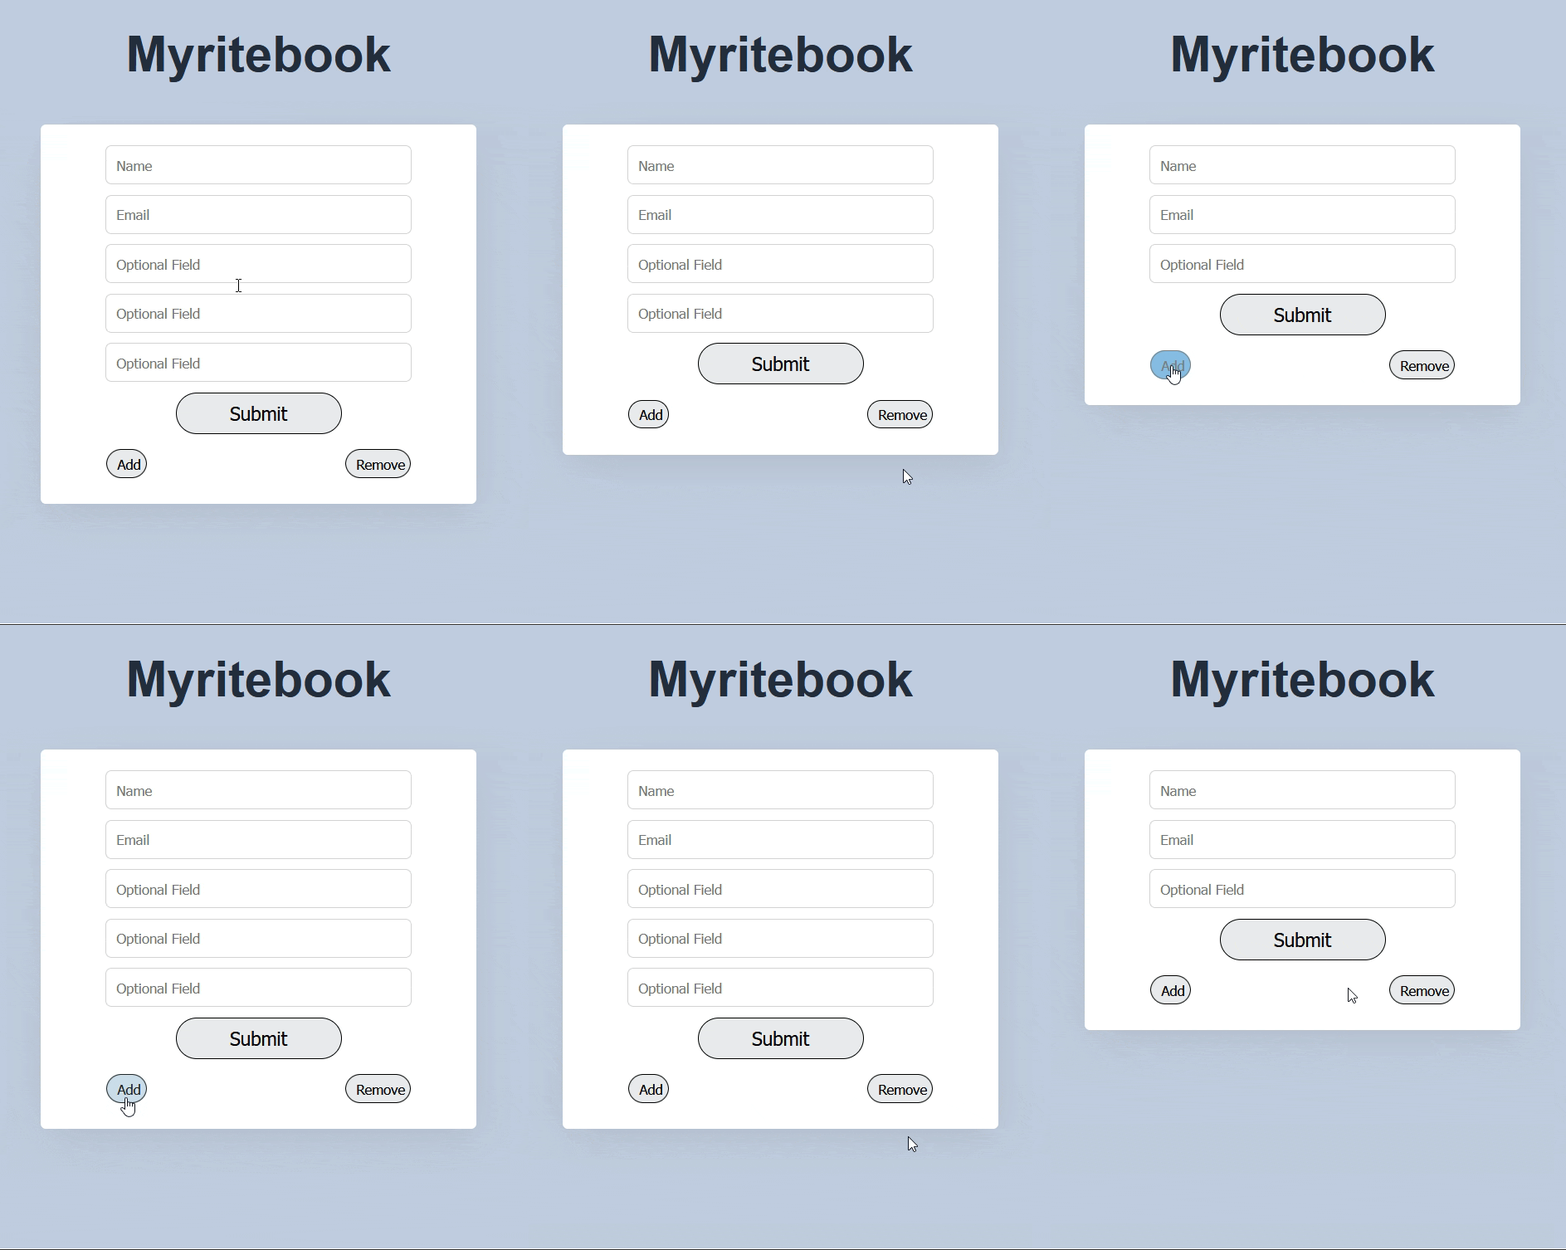
Learn how to build interactive and responsive dynamic fields using JavaScript, HTML and CSS. This beginner-friendly tutorial walks you through every step — from creating your structure and styling it to adding and removing form fields dynamically with JavaScript.
📘 Project Overview
Forms are essential elements of modern websites — they collect data, feedback, and user inputs. You can make these dynamic fields using JavaScript — allowing users to add or remove them in real-time without reloading the page.
In this guide, you’ll learn how to:
- Dynamically generate form fields with JavaScript
- Style them using CSS
- Control adding and removing fields interactively
Let’s start building!
🧱 Step 1: HTML Structure
We’ll begin with the HTML layout.
In this example, we’ll create a simple form with two static fields (Name and Email) and one dynamic field that users can duplicate or remove.
👉 HTML Code:
<!DOCTYPE html>
<html>
  <head>
    <title>Dynamic Fields</title>
    <link rel="stylesheet" type="text/css" href="styles.css" />
    <link
      rel="stylesheet"
      type="text/css"
      href="https://stackpath.bootstrapcdn.com/font-awesome/4.7.0/css/font-awesome.min.css"
    />
  </head>
  <body>
    <h1>Myritebook</h1>
    <div class="container">
      <form action="" method="POST">
      <div id="formfield">
        <input type="text" name="text" class="text" size="50" placeholder="Name" required>
        <input type="text" name="text" class="text" size="50" placeholder="Email" required>
        <input type="text" name="text" class="text" size="50" placeholder="Optional Field">
      </div>
      <input name="submit" type="Submit" value="Submit">
    </form>
      <div class="controls">
        <button class="add" onclick="add()"><i class="fa fa-plus"></i>Add</button>
        <button class="remove" onclick="remove()"><i class="fa fa-minus"></i>Remove</button>
      </div>
    </div>
  <script src="script.js"></script>
  </body>
</html>
🧩 Explanation:
<form>contains three input fields.- The first two fields (
NameandEmail) are fixed. - The third field (
Optional Field) is the one we’ll duplicate dynamically. - Two buttons below the form — Add and Remove — trigger JavaScript functions to manage fields.
🎨 Step 2: CSS Styling
Now that the structure is ready, let’s make it look clean and modern with some CSS.
Create a file named styles.css and paste the following code.
👉 CSS Code:
body {
  background-color: #c1cce0;
  font-family: 'Jost',sans-serif;
  color: #fff;
}
h1 {
  text-align: center;
  font-size: 48px;
  color: #232c3d;
}

.container {
  width: 400px;
  margin: 40px auto;
  padding: 10px;
  border-radius: 5px;
  background: white;
  box-shadow: 0px 10px 40px 0px rgba(47,47,47,.1);
}

input[type="text"]{
  padding: 10px;
  margin: 10px auto;
  display: block;
  border-radius: 5px;
  border: 1px solid lightgrey;
  background: none;
  width: 274px;
  color: black;
}

input[type="text"]:focus {
  outline: none;
}

input[type="Submit"]{
  margin: 10px auto;
  display: block;
  width: 40%;
  height: 40px;
  border: 1px solid;
  border-radius: 25px;
  font-size: 18px;
  cursor: pointer;
}

input[type="Submit"]:hover{
  background: #2691d9;
  color: #e9f4fb;
  transition: .5s;
}

.controls {
  width: 294px;
  margin: 15px auto;
}

.add {
  padding: 5px;
  border: 1px solid;
  border-radius: 25px;
  cursor: pointer;
}

.remove {
  float: right;
  padding: 5px;
  border: 1px solid;
  border-radius: 25px;
  cursor: pointer;
}
.controls button i{
  margin-right: 5px;
}

.remove:hover, .add:hover{
  background: #2691d9;
  color: #e9f4fb;
  transition: .5s;
}
🧩 Explanation:
.containercenters the form and adds a soft shadow.- Inputs are styled with rounded corners and subtle borders.
- Buttons (
AddandRemove) change color on hover to provide user feedback.
⚙️ Step 3: JavaScript Functionality
Finally, we’ll add interactivity to the form — the part where new fields are added or removed dynamically.
Create a file called script.js and paste the following JavaScript code.
👉 JavaScript Code:
var formfield = document.getElementById('formfield');

function add(){
  var newField = document.createElement('input');
  newField.setAttribute('type','text');
  newField.setAttribute('name','text');
  newField.setAttribute('class','text');
  newField.setAttribute('siz',50);
  newField.setAttribute('placeholder','Optional Field');
  formfield.appendChild(newField);
}

function remove(){
  var input_tags = formfield.getElementsByTagName('input');
  if(input_tags.length > 2) {
    formfield.removeChild(input_tags[(input_tags.length) - 1]);
  }
}
🧩 Explanation:
- The
add()function:- Creates a new
<input>element. - Sets its attributes (type, name, placeholder, etc.).
- Appends it to the form dynamically.
- Creates a new
- The
remove()function:- Finds all existing
<input>elements. - Removes the last one (only if more than two inputs remain).
- Finds all existing
Final Output:

🧠 FAQ
1. Why use dynamic form fields?
Dynamic fields improve user experience by allowing flexible data input without page reloads.
2. How can I add new form fields?
Use JavaScript’s document.createElement() and appendChild() methods to generate and insert new input fields.
3. How can I remove form fields?
Locate the last field in your form and delete it using removeChild().
4. Can I use this for other input types?
Absolutely! You can extend this logic for dropdowns, checkboxes, or even file inputs.
🎬 Conclusion
By combining HTML, CSS, and JavaScript, you can easily create interactive forms that adjust to users’ needs in real-time.
Dynamic forms are not only more engaging but also practical — especially for forms requiring multiple similar inputs.
Experiment with the code, enhance it with validation, and explore advanced features like saving form data dynamically.
